How to Build a Home Water Quality Monitoring System
Major critical importance keeps your water quality great-good-drink, whether from faucet, well, or filtered. Bacteria, toxins, and other nasty pollutants in dirty water bring bad outcomes and bad health for anyone. Guess what? With a fantastic instrument to check your water while at home, you can always keep tally of the safety and quality maintained in your water. This guide tells you how to organize a very strong home check-up at a very low cost using a few readily available tools and gadgets.
The Perks of Checking Your Water at Home?
There are a bunch of pluses when you decide to keep tabs on your home's water quality:
Health Protection – Spot dangerous elements in water that might make you sick.
Early Warning System – Spot shifts in water clarity to stop big problems.
Cost Savings – Spend less money on pro water checks by doing your own tests often.
Environmental Awareness – Watch for nasty stuff messing with your neighborhood's water.
Improved Filtration Efficiency – Make sure your water cleaning gadgets are doing their job right.
Main Points to Monitor in Water Quality
To build your system knowing what makes water good or bad is key:
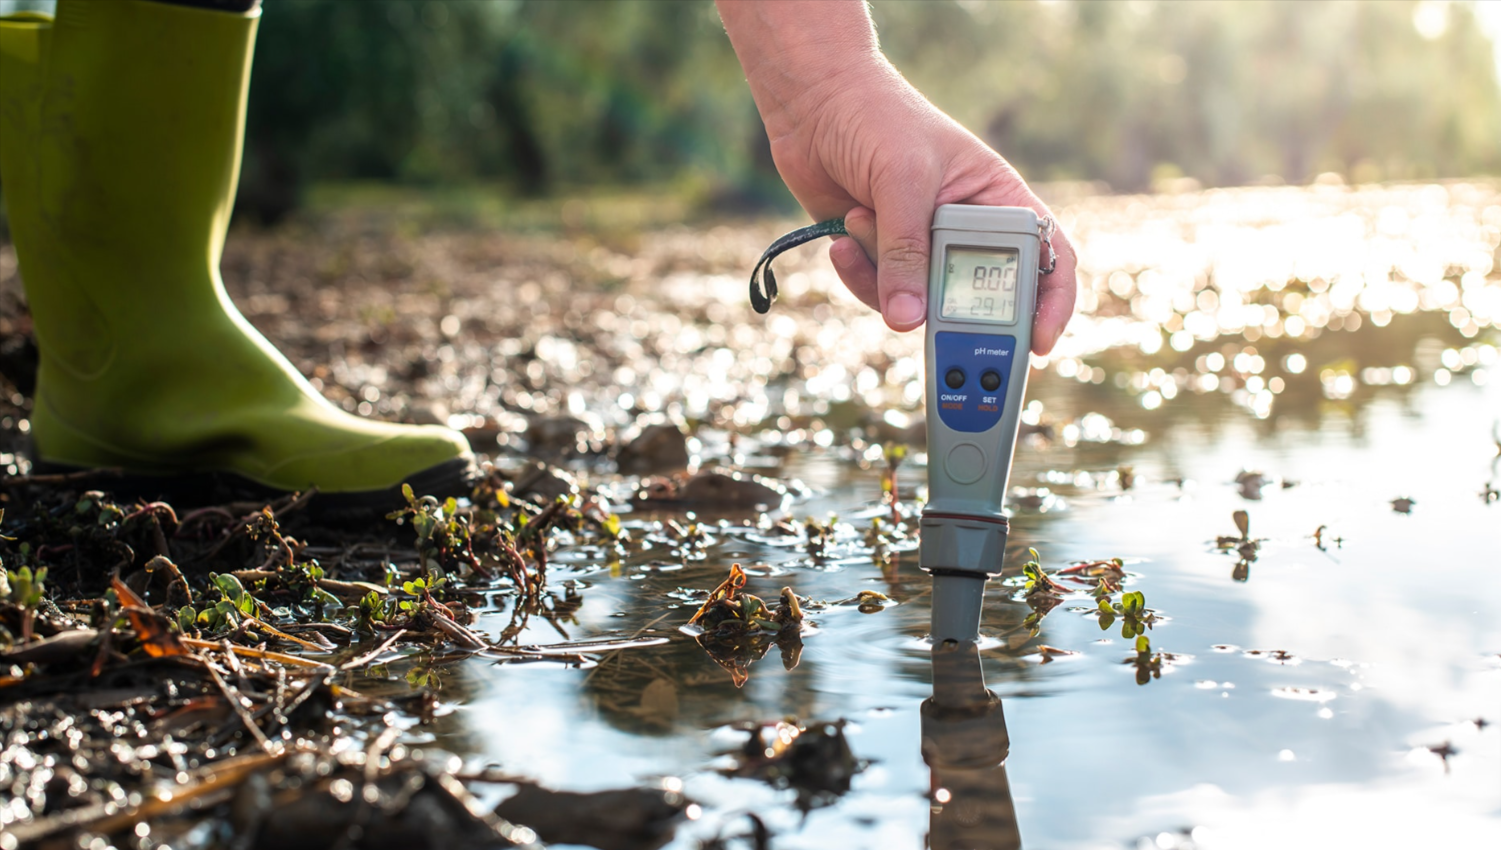
pH Level - Shows if water is more acidic or more on the base side. A good pH span sits from 6.5 up to 8.5.
Turbidity - It's all about how clear the water looks; if it's not clear and has high turbidity, that might mean there's muck or other bad stuff mixed in.
Temperature - This one messes with the chemical mix in the water and the chance of bacteria setting up shop in there.
Total Dissolved Solids (TDS) - Keeps track of stuff you can’t always see, like tiny minerals, salts, and different metals swimming around in the water.
Electrical Conductivity (EC) - Tells us if there are ions that have dissolved in the water.
Dissolved Oxygen (DO) - Super necessary for all the creatures living in the water and for keeping the water from going stale.
Chlorine Levels – You find it in city water; too much isn't good for you.
Bacteria & Contaminants – Stuff like E. coli, lead, nitrates, and other bad things might be in there.
Bits and Pieces for Your Water Check-Up Gadget
Gather these items to make your water-watching device:
1. Gizmos That Look at Water Purity
pH Gizmo – Looks at how sour or basic your water is.
Mud Meter – Spots tiny bits floating in your water.
Junk Meter – Keeps an eye on invisible stuff dissolved in water.
Thermometer Bit – Finds out if your water is hot or cold.
Zap Tester – Figures out the cleanliness of water by zapping it.
Pool Smell Tracker – Keeps tabs on how much pool cleaner is in the faucet water.
2. Brainy Board (Arduino or Raspberry Pi)
A microcontroller gathers data from sensors then shows it on a display or beams it to an app.
3. Thing to Hold Water Samples
A spotless vessel to grab and test water samples.
4. Thing to Show Info or Connect Stuff
LCD Display – Puts water quality stats right in front of you.
Wi-Fi/Bluetooth Thingy – Pitches info over to your phone or computer so you can check on things from afar.
5. Thing to Power It All
Batteries or a straight-up plug-in deal to keep the gadget going all the time.
How to Make Your Own Gadget for Checking Water at Home
Step 1: Snag All the Stuff You Need
Get what you need: sensors, a microcontroller, a screen to show stuff, and something for power. You can buy kits on the net that already have the sensors packed in there.
Step 2: Make the Sensors and Microcontroller Work Together
Fasten the pH sensor onto the microcontroller then run a test with some calibration stuff.
Hook up the TDS meter so you can figure out how much solid junk is in the water.
Put the temperature sensor in place to keep an eye on how hot or cold the water gets.
Install the turbidity sensor to keep track of how clear the water is.
Got IoT tricks up your sleeve? Then get the Wi-Fi module tied in for checking things from afar.
Step 3: Create the Data Gathering Programme
Get your code on the Arduino ready! Fire up the Arduino IDE and set it up to gather the sensor digits. Don't forget to put those numbers up on an LCD display.
Feel more like coding with a Raspberry Pi? Cool, use Python to dig into the data and make some neat graphs.
Step 4: Put Together the Gadget Parts
Make sure every sensor stays dry. Stick them in a case that keeps water out.
Place the container for water samples somewhere handy so grabbing fresh water's a breeze.
Got an LCD display? Hook it up right to catch the data live.
Step 5: Make Those Sensors Work Right
Grab some calibration solutions that are good to go for setting up the pH and TDS sensors.
Put the first sensor readings side by side with readings from a regular test kit. You gotta make sure things are on point.
Step 6: Dive Into Checking That Water Quality
Check your tap, well, or filtered water .
Keep logs of your readings to spot variations.
With IoT functions, configure notifications for unusual measurements, like too much pH or murky water.
Analyzing Water Purity Figures
Knowing what your sensors tell you is key to knowing whether your water's good to drink:
A pH Lower than 6.5 or Higher than 8.5 – Signals potential acid or alkaline pollution.
Elevated TDS Counts (above 500 ppm) – Points to too many minerals or possible contaminants.
Cloudiness or High Murkiness – Could be a sign of grime, germs, or other pollutants.
Scanty Dissolved Oxygen – Implies bacteria could be thriving or the water isn't moving.
Chlorine Over 4 mg/L – This level isn't safe to drink.
Enhanced Functions for Automated Systems
To upgrade a complex mechanism, you might think about including:
Cloud Integration – Send your data sky-high for a quick look-see as it happens.
SMS or Email Alerts – Nab a heads-up when your H2O ain't up to snuff.
Automatic Filtration System – Flip the switch on cleaning your liquid stuff when it gets mucky.
Perks of Having a Home H2O Check-Up Kit
Guarantees Clean Water for Drinking – Recognizes possible contaminants to shield health.
Maintains Filters in Good Shape – Checks if filters do their job right.
Cuts Costs for Lab Checks – Lowers how much you gotta pay for pro tests.
Delivers Updates as They Happen – Lets you know the latest on your water status.
Boosts Care for Our Planet – Aids in watching over pollution in nearby water spots.
Problems and Downsides
Starting Expenses – Purchasing sensors and microcontrollers might cost a bunch.
Tuning the Sensors – They'll need consistent tweaking to keep 'em accurate.
Powering It Up – You've gotta have a stable power source to keep it running all the time.
Stayin' Online – For IoT stuff, a solid Wi-Fi connection's a must-have.
Wrapping It Up
Piecing together your own water quality checker for your crib is both a wise move and a satisfying gig, which makes sure the H2O you're using is clean enough for your drinks and everyday stuff. Tossing sensors into the mix to keep an eye on important stuff like pH how murky it is, and what's dissolved in it means you're catching problems . Then you can hustle to bump up the quality of your aqua. Picking either a simple, hands-on gadget or a fancy schmancy automatic one peeping your home's water situation is a solid play for staying healthy and knowing what's up with your environment.
If you get the proper gear and arrange it well, you can snag some pretty important knowledge about your drinking water. Make sure your folks get the pure and safe wet stuff. Kick off now and grab the reins on your water's goodness!